Wizard
Overview
Wizards in GWv4 allow you to create guided workflows for users, making it easier to configure complex calibrations and enforce relationships between options. They are particularly useful for setting up new calibrations or guiding users through complex configurations.
Managing Wizards
Navigate to: Wizards | Manage Wizards
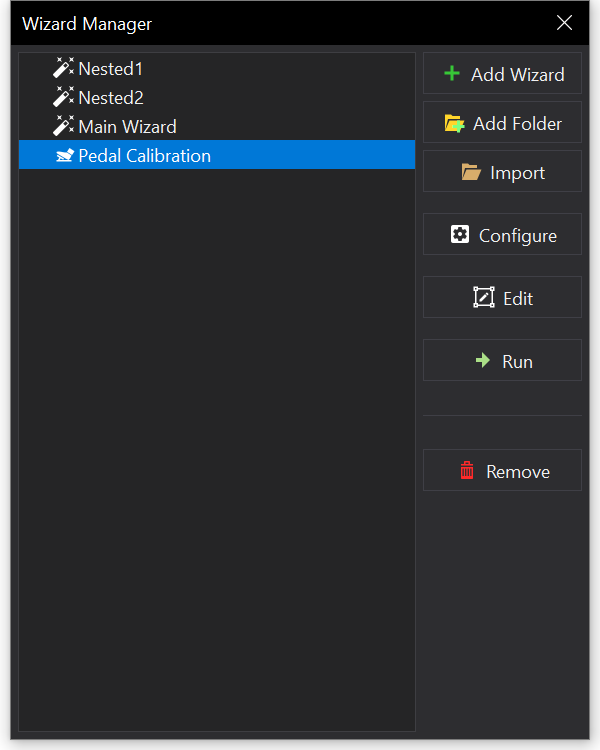
Creating Wizards
Navigate to: Wizards | Manage Wizards | Add Wizard
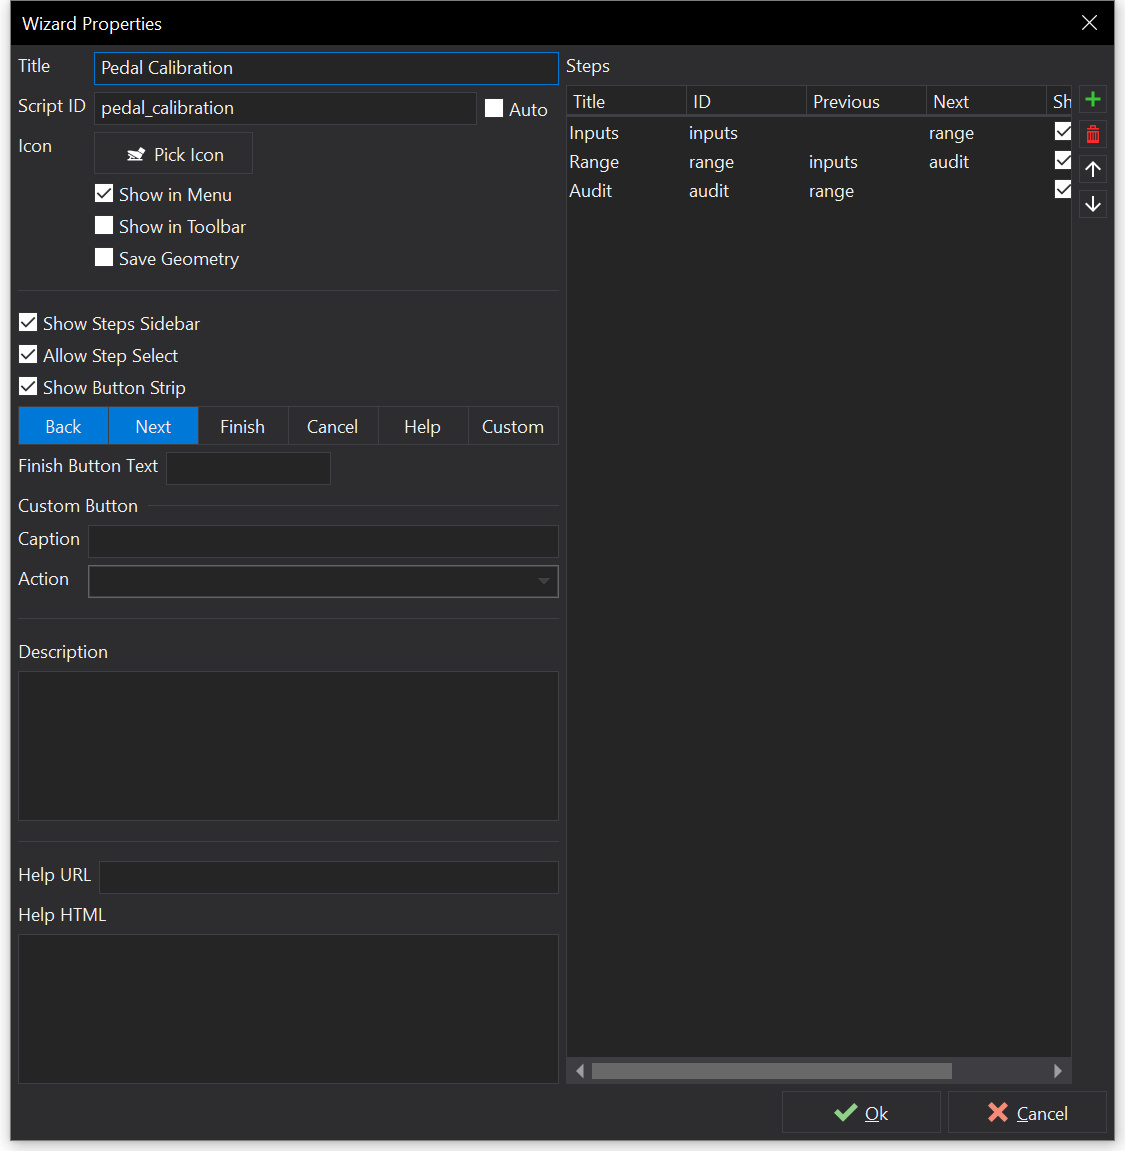
Main options:
- Title - Give the wizard a suitable title
- Script ID - Unique identifier for your wizard
- Icon - Associate a small graphic with the wizard
Show button strip to configure which buttons you want displayed at the bottom of the wizard.
Typical options for a multi-step wizard would include:
- Back
- Next
- Finish
- Cancel
Adding Steps
Add the steps using the green plus in the top right. These are the steps/pages of the wizard.
For each step, configure:
- Title - Descriptive name for the step
- ID - Unique identifier
- Previous - ID of the previous page
- Next - ID of the next page
Advanced Routing: If you are developing a wizard with several options and “routes” through the pages, you will want to configure the “Next” and “Back” buttons in JavaScript, the language of the script.
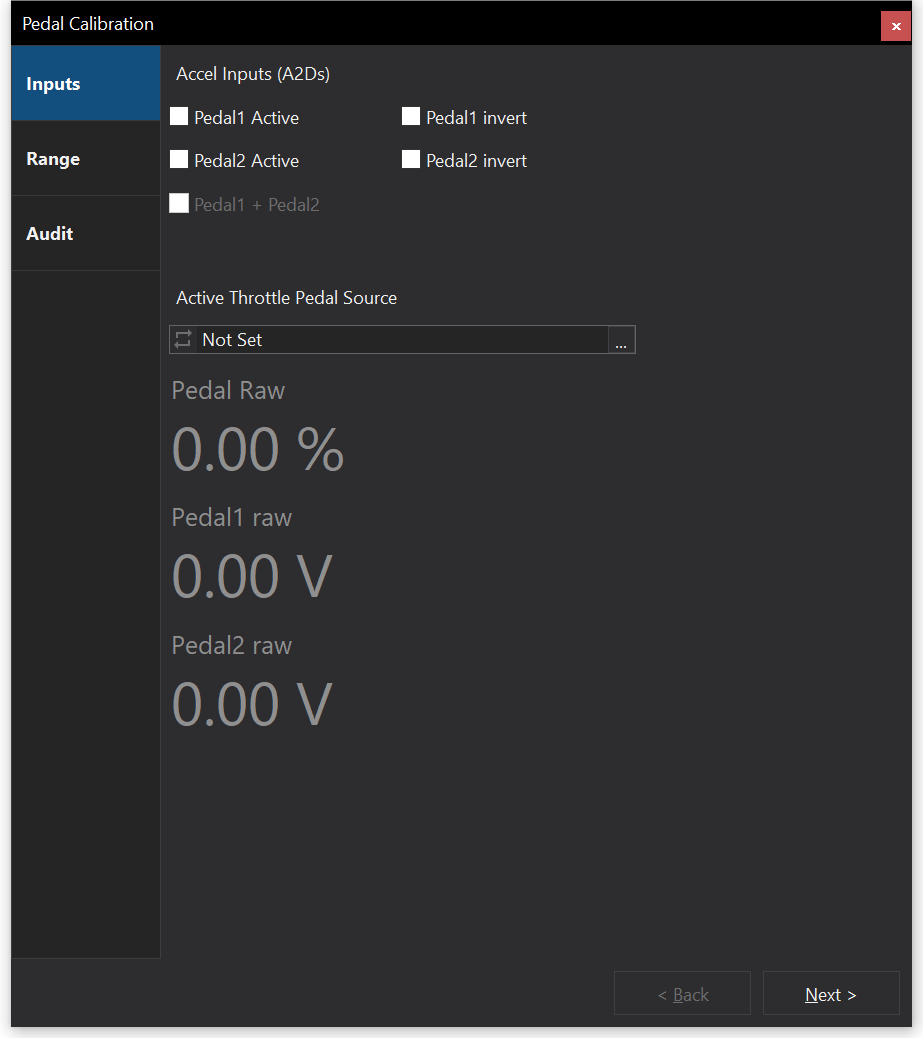
Press “OK” and you will be directed to a space where you can edit the components of each step of the wizard.
Editing Wizards
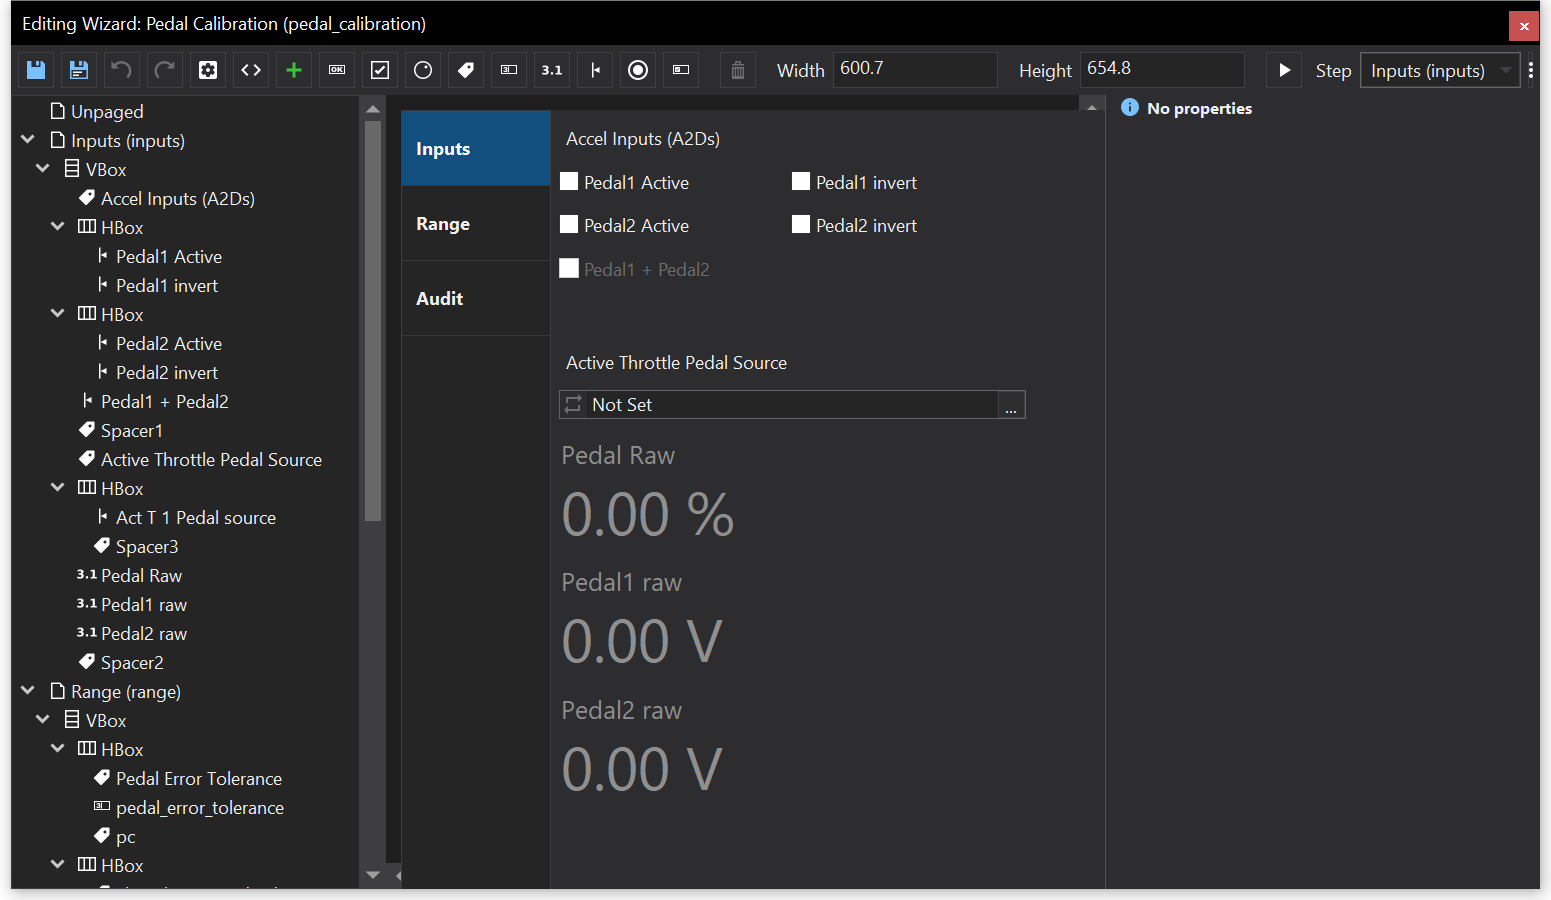
Add Views/Options using the green plus in the top header. Write text using “Label”, add option selection using “Option Editor” and so on.
Ensure that each element you add to the page has an appropriate Script ID, so you can reference it and manipulate it in the script.
To access the script, click the  button in the top left. This is where you will write code for the functionality of buttons, checkboxes and other elements you’ve added to your pages.
Scripting
Options/Tables/Graphs added to the page directly update the value in the calibration. On the other hand, views such as Combo Boxes and Check Boxes have no direct effect on the calibration options, unless you script it to be so.
Below is an example of a function linking the checking of a checkbox to the updating of a calibration options:
// Updates the ECU option "Err Mask Gear Ratio" if the checkbox is checked
function UpdateErrorFlag()
{
    if (window.checkbox_enable_error_flag.checked = true) {
        err_mask_option = ecu.option("err mask gear ratio");
        err_mask_option.setString("ON");
    }
}

window.checkbox_enable_error_flag.on("click", UpdateErrorFlag);
Your script should be made up of three key sections:
- Initialising variables: Initialising values and element parameters
- Function definitions: Defining important functions such on “OnNext” and “OnBack”, describing how the wizard progresses through the pages
- Event handling: Mapping the functions to events, such as buttons being clicked or options being selected
For more information on scripting, see Scripting.
Common Scripting Errors
-
If you have scripted your page changes, and the “Next” button is enabled depending on a given selection, you can occasionally get the page transitions chaining, ending on the page after the one you wanted, or even further. This can be countered by disabling “Next” after the first page transition, or by removing selections on the next page as you transition to it.
-
If your variables are not declared, you may be using them in the wrong scope. “let” is block scoped, so those variables are only accessible in the block is was declared in. This is the code section within a pair of curly brackets. On the other hand, “var” is function scoped. It is easiest to declare the ECU options just before you use them in the block. Alternatively, it may be due to a mismatch between the ID you wrote and the actual Script ID defined in the Wizard editor.
-
If you cannot access Combo Box options, follow this script structure:
// Initialisation
window.cbox_name.items = [
    { text: "Choice 1", port:1 },
    { text: "Choice 2", port:2 },
];

// Function Definition
// Changes option channel based off user's selection
function OnChoiceSelected(index, value)
{
     (value) {
        let option = ecu.option("option name");
        option.setString("value.text");
    }
}
// Event Handling
window.cbox_name.on("change", OnChoiceSelected);