Sequencer
The Sequencer can be used to create and execute a list of commands. Various items like CAN signals, variable setting and pop-up windows can be added to the sequence. This can be useful for automating production testing.
To open the Sequencer dialog, go to . Any previously saved sequence will appear, here an example sequence for calibrating the throttle pedal is shown. Otherwise the left-hand panel will be empty.
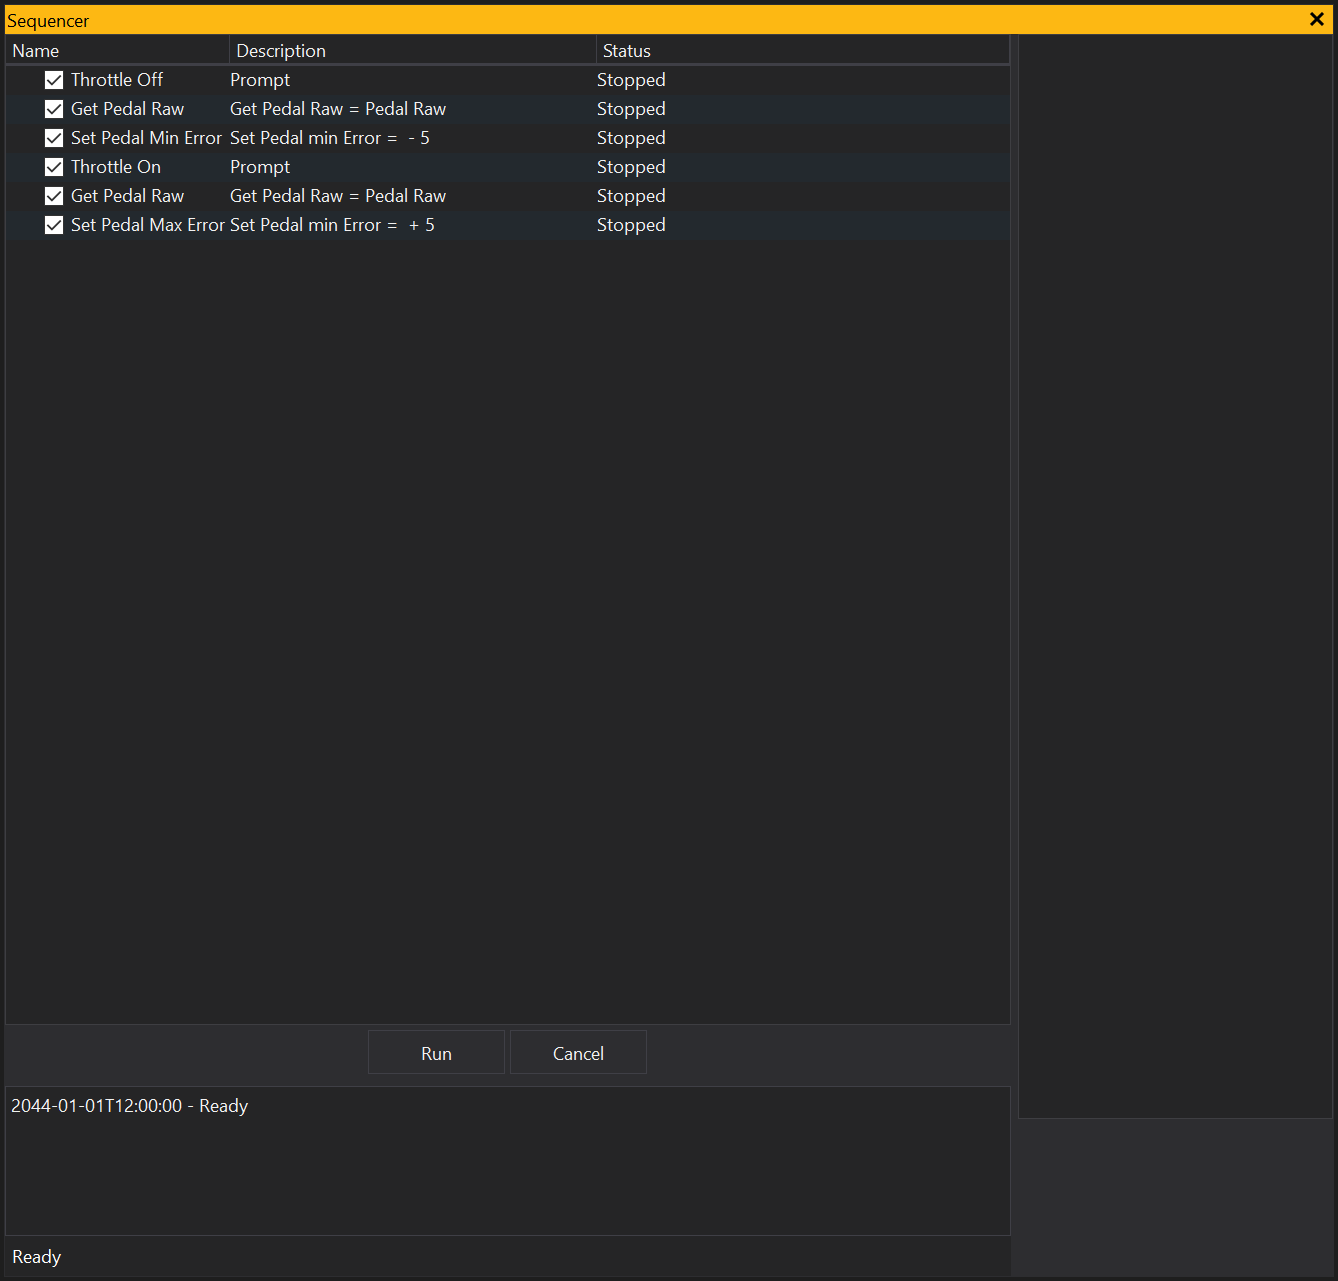
The left-hand panel displays the current list of items to run and will be empty. The right-hand area displays the properties of the currently selected item. The bottom window is the sequence log that will be populated when the sequence is executed. The sequence is part of the layout file and will be saved within the .gxt file.
Create a sequence
Sequence controls can be found in the context menu by right-clicking in the left-hand panel.
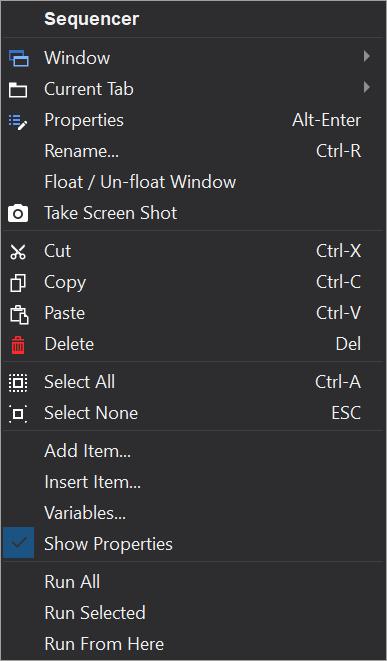
To add a new item to the sequence, select ‘Add Item…’, and a selection dialog will appear with a list of items. You can also insert items before the currently selected item by right-clicking on the item and selecting ‘Insert Item…’. Some items can also have child items, which, if applicable, can be added via ‘Add Child Item…’. You can also remove an item, using ‘Delete’. The sequence will be executed in the order that they appear in the list, and unchecked commands will be skipped. To reorder the list, click and drag the item to its new position. To edit the currently selected item, double click on the desired property in the right-hand panel. The panel can be toggled on and off through the context menu.
Run a sequence
When you are ready to execute the sequence of commands, click the ‘Run’ button. If you want to run an item individually, double click it. The context menu also has options to ‘Run All’, ‘Run Selected’, and ‘Run From Here’. To abort the sequence, click ‘Cancel’.
The progress of the sequence will be logged in the window below the sequence panel, and for each item: in the ‘Status’ column, and in the Result variable. The ‘Status’ column will show one of these states:
- ‘Passed’ - The item has been executed successfully.
- ‘Failed’ - The item has failed to execute. An error message will be displayed in the log.
- ‘Skipped’ - The item has been skipped.
- ‘Ready’ - The item is ready to be executed.
- ‘Running’ - The item is currently being executed.
- ‘Stopped’ - The sequence has not yet reached this item or it is stopped.
- ‘Canceling’ - The sequence is being canceled.
- ‘Canceled’ - The sequence has been canceled.
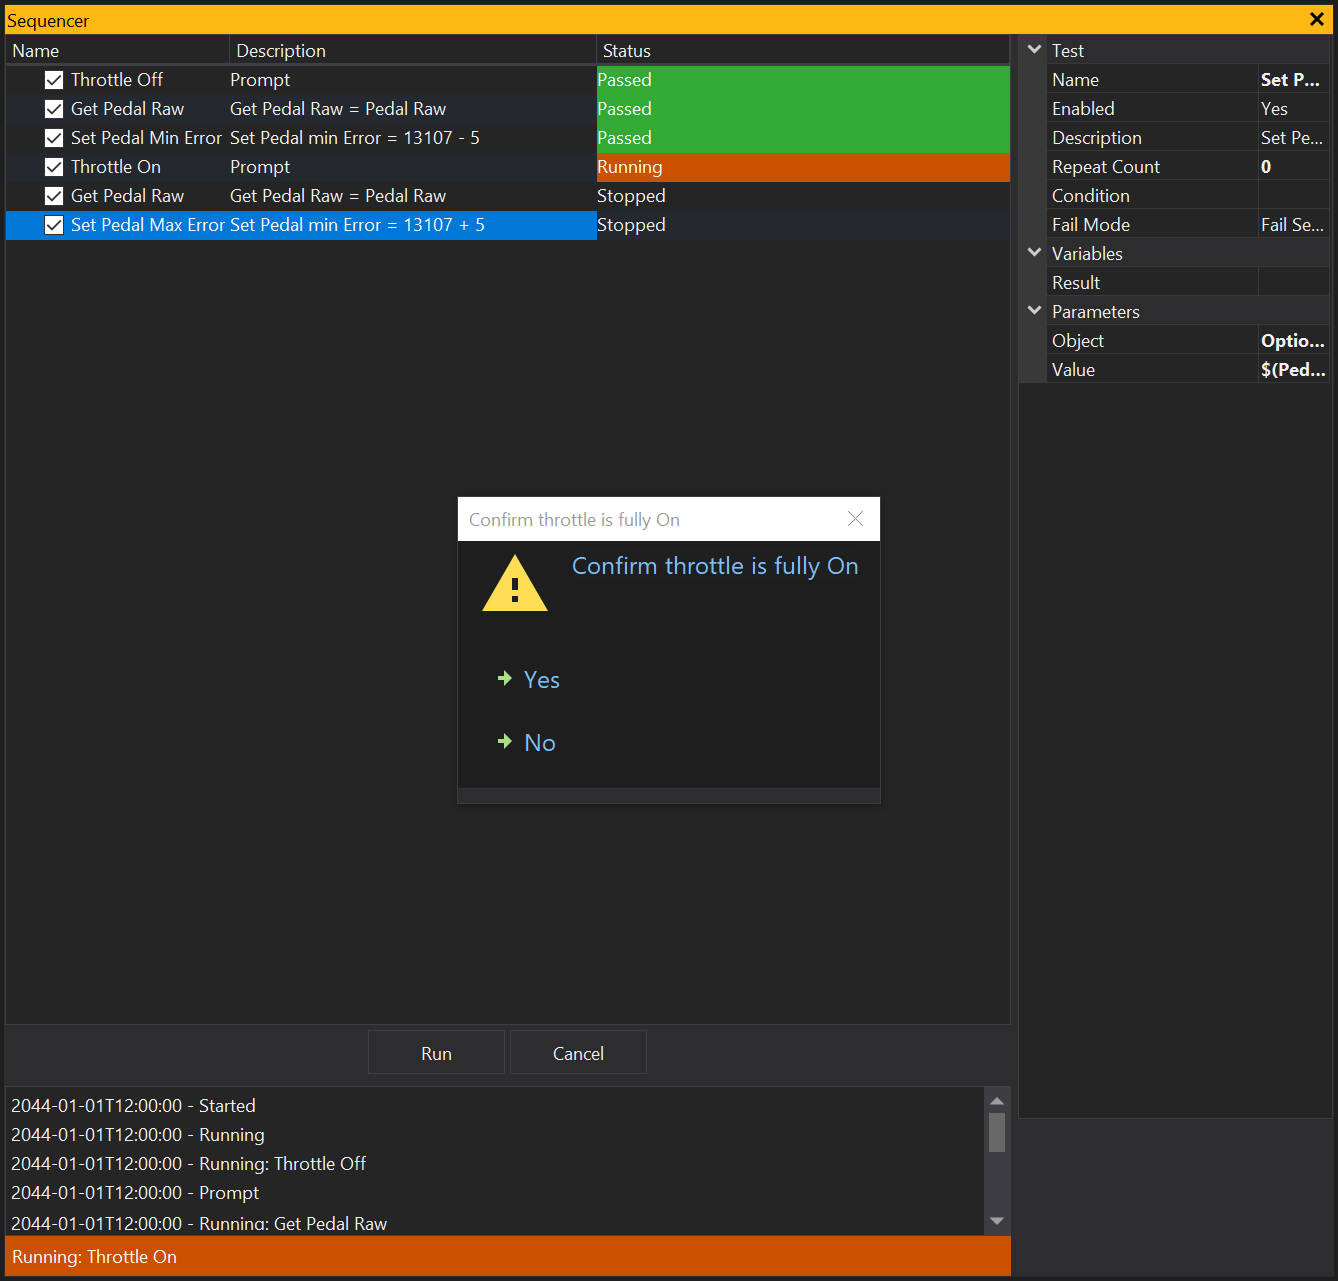
A running sequence will look like this:
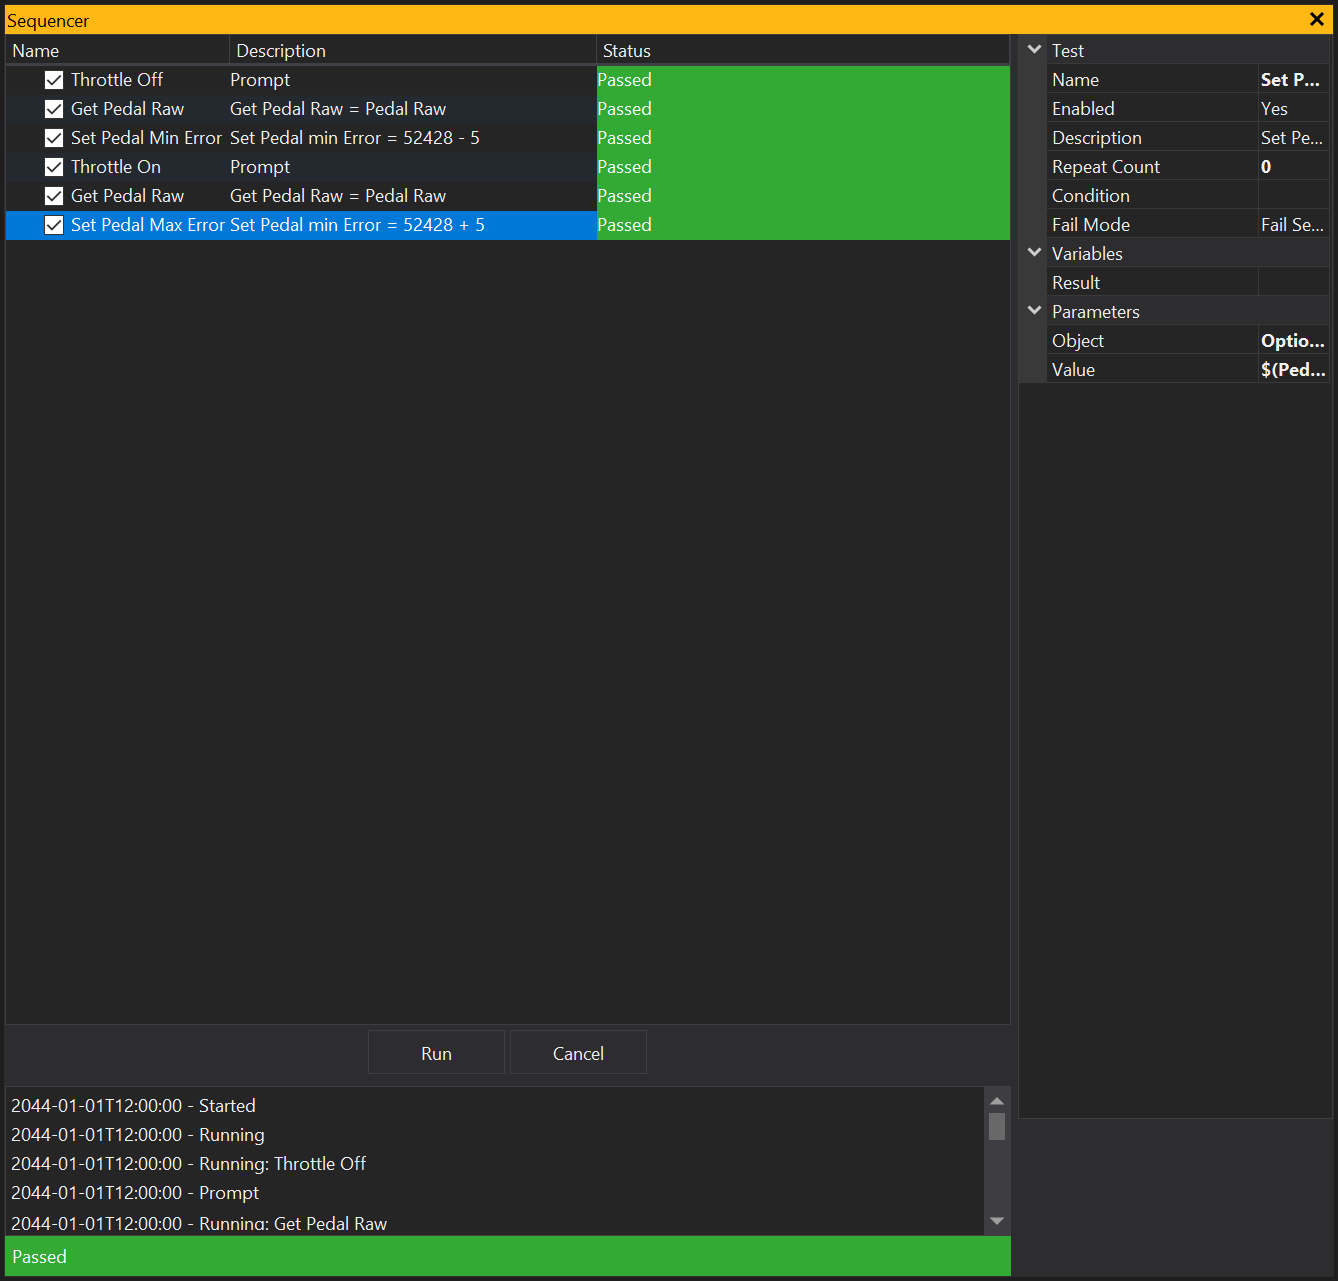
If a command fails, the sequence will stop and the item will display a failed status. A finished sequence will look like this:
Using Variables
The Variables Window, accessed through the context menu, allows you to track variables generated by commands. Commands like ‘Object Value: Get’ and ‘Set Variable’ that contain ‘Output Variable’ or ‘Variable’ property under Parameters allow you to create and set variables for use in later sequence items. Choose a name for the ‘Output Variable’ property and set its value in the ‘Value’ property. To use the variable in another sequence item, wrap the variable name in brackets and prepend a dollar sign, e.g. ‘$(variableName)’.
Test Results
Test results can be stored in a variable by setting the ‘Result’ property under Variables.
View Properties
Properties editable via the properties editor.
| Property | Script ID | Description |
|---|---|---|
| Title | title |
The title of the window. |
| Script ID | id |
The scripting ID of the window. Can be used as an alternative to the title for searching for windows from scripts. |
| Tool Tip | tooltip |
Window tool tip. |