Tools
Overview
Various tools and functions are provided that function alongside the editing features on the main tabs:
Various tools and functions are provided that function alongside the editing features on the main tabs:
opens the CAN Ports and Activity window, which is used to configure physical CAN interfaces on the PC, connect them to the simulator and monitor CAN traffic, without needing to start the simulator.
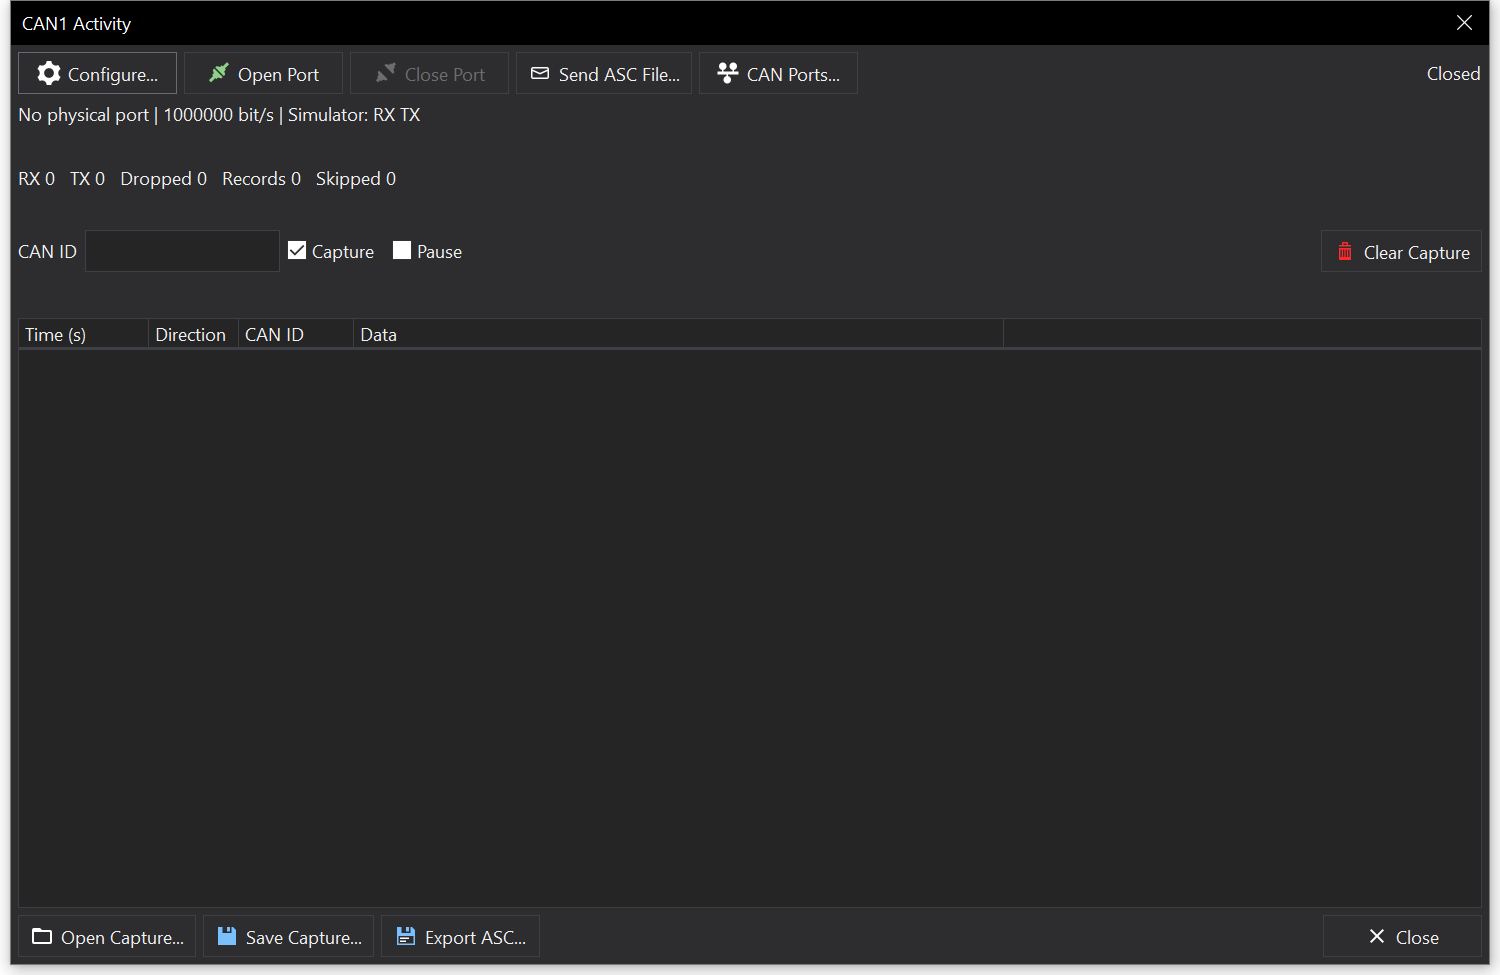
A port’s activity window may also be opened from the Configure | CAN Ports sub-menu, from the CAN Ports… button in the window, or from the Simulator Tab Options… dialog.
Click Configure… to open the port’s configuration:
| Setting | Description |
|---|---|
| Physical port | The PC’s CAN interface to use for this port. Select None to remove the physical port binding. Click Refresh to update the list of interfaces. |
| Bitrate (bit/s) | The CAN bit rate. |
| FD bitrate (bit/s) | The CAN-FD data bit rate. Use 0 for classic CAN. |
| Sample point (%) / FD sample point (%) | The bit timing sample points. |
| Receive in simulator | Passes CAN frames received by the interface to the simulator. |
| Transmit from simulator | Transmits CAN frames sent by the simulator on the interface. |
| Use setup bitrate during simulation | Uses the CAN port bit rate from the display setup while the simulator is running. |
| Open and close with simulator | Opens the port when the simulator starts and closes it when the simulator stops. Ports are not opened automatically when Dash Design starts. |
Click Apply to save the configuration. Applying the configuration does not open a closed port.
Use Open Port and Close Port to open or close the physical interface. The current state is shown next to the buttons.
While a port is open, CAN frames are captured and listed with their Time (s), Direction (RX, TX, Error, Warning or Info), CAN ID and Data. CAN-FD frames are marked FD.
123, or 123x for an extended ID). Leave empty to show all IDs.Click Send ASC File… to play back the CAN frames in an ASC file, either on the open port or to the running simulator. The Send ASC File window shows the current line of the file; use Pause, Loop and Restart to control playback.
If the port is not open and the simulator is not running, there is no playback destination; open the port or start the simulator first.
The font editor is used to select fonts for gauges from either gauge properties Standard Gauge Properties or the Unique Fonts Dialog.

Font Editor
Click Select Existing Font to choose a font that is already used in the setup. Reusing existing fonts reduces the memory used by the setup.
If the display supports vector fonts then the font type will be available. See Font Types .
If selected, the font will be converted to a monochrome bitmap (rasterized) for use by the display.
If selected, the font file (outlines) will be sent to the display without rasterization. This allows the display to render different sizes from the same font data and antialias (smooth) the outlines.
Available fonts are listed. Select an item from the list to change the font face and adjust the size.
Use the  Italic and
 buttons to change the font style.
For bitmap fonts, the character cropping rectangle may be adjusted using the cropping options. It can be useful to display the font table when adjusting the cropping options.
Cropping the font can be useful to reduce the memory usage for bitmap fonts and also when fonts do not report accurate bounding rectangles.
The Uncompressed and Compressed sizes of the bitmap font are shown, to help with optimizing memory usage.
Click the optimize button to optimize the cropping rectangle based upon used pixels used by all characters in the font table.
The set of characters included in the font can change if text within the setup is changed, which could result in unintended clipping of some characters.
This can be useful for checking that all characters will be fully rendered, particularly if adjusting cropping:

Font Table
Vector fonts may be added to the setup by adding TTF (TrueType) or OTF (OpenType) font files to the setup. The font files are stored directly in the setup file.
Select an item from the list to apply that font to the gauge.

Vector Font Dialog
Use the  Add button to select a font file from disk. You will be asked to confirm that you have the licence rights to embed the font in the setup.
Adding fonts will not change the set of fonts installed on your PC for use by other applications.
Different fonts have different licensing restrictions. You must confirm the license for each font added to the setup and ensure that you are complying with the license by using the font in your setup.
Use the  Delete button to remove any fonts that are no longer required.
Adjust Size to select a font size for the gauge. With vector fonts, multiple sizes can be used at once for the same font data on different gauges.
Adjust Offset to offset the rendering position of the font. This is rarely required but can be useful in cases where the rendering origin for the font is not in the correct position.
Check Enable AA Rendering to enable anti-aliasing when rendering the font. This can increase memory usage and may not be supported by all display types / versions.
Memory Usage shows the size of the font in the setup binary.
Depending upon the display type, there may be the option to use either Bitmap fonts or Vector fonts.
All display module types support bitmap fonts. When the setup is programmed into the display, fonts are converted to monochrome bitmap images with a sub-image for each character.
If multiple sizes of the same font are used then each size will require a separate bitmap generated for it. It is therefore worth limiting the set of font sizes used, where possible to reduce memory usage.
By default, the Windows-1252 code page will be used for mapping characters, sometimes referred to as a charset. Some display setups may use characters that are not representable by the default code page. In these instances Dash Design will generate a custom code page so that these characters may be rendered by the display.
Use the Unique Fonts tool to combine similar bitmap fonts to reduce resource usage.
Some display types support ‘vector’ fonts (e.g. TTF).
Vector fonts have the following advantages:
Since vector fonts allow the display to support unicode, gauges like Label Gauge or Text Input Gauge that are using vector fonts will be encoded with a unicode representation (UTF-8).
When using unicode characters in Notifications (see Notifications Tab ), it is best to ensure that gauges that use them are either exclusively vector fonts or bitmap fonts to avoid potential rendering issues since different charsets are expected.
Some application settings are available via the Alt + F7 command.

Preferences Dialog
Adjust the relevant preferences using the property grid, descriptions for the properties are shown at the bottom of the dialog.
| Category | Description |
|---|---|
| Confirmations | Re-enables confirmation prompts that have been turned off, for example Confirm Clear CAN Capture (see CAN Ports & Activity ). |
| Locked Setup Information | Show Additional Hashes shows the additional hashes on the File Info tab of locked setups. See Locked Setups . |
| Tooltips | Tooltip Dwell Time [s] sets how long the mouse must rest over a control before its tooltip is shown; Tooltip Show Time [s] sets how long tooltips are shown for (0 disables tooltips). |
| Locked Setup Auto Save | Automatically saves a locked version of the setup when saving or programming. See Locked Setups . |
The Configure menu also provides the following settings:
programs the PC’s local date and time into the display’s real-time clock, for displays that have one.
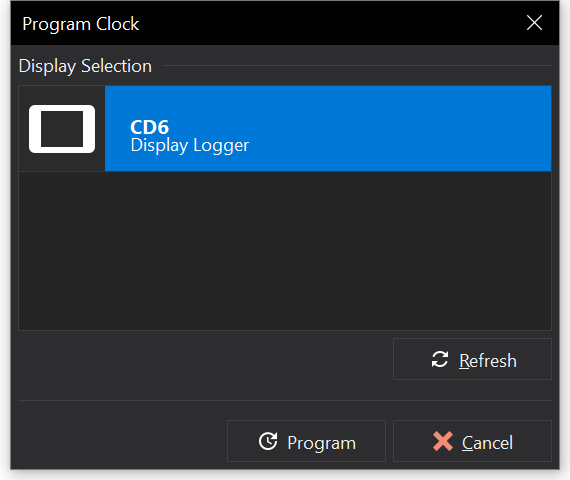
The progress and a log of messages are shown. If the process fails, refer to the message log as it may identify the cause.
The setup checker identifies and in some cases automatically fixes common setup errors and warnings.

Setup Checker
The setup checker may be shown by using the menu action or by double clicking on the setup check status indicator on the application status bar at the right-hand side:

Status Bar
Messages are listed with a severity:
| Severity | Description |
|---|---|
 Error |
Indicates a major issue in the setup that must be resolved prior to programming. |
 Warning |
Indicates a minor issue that ought to be addressed otherwise the display may not behave as expected. |
 Info |
Typically indicates something minor that has been fixed automatically. |
Messages may be associated with an item in the setup. Double clicking on messages will attempt to locate the item in Dash Design and show it. For example, if the message relates to a Channel then Dash Design will display the Channels Tab and select the Channel.
Some setup check messages are ‘sticky’ and will remain in the list until acknowledged (typically these are automatic fix notifications). Other messages are removed automatically when the offending condition has been resolved.
Click the  Refresh button to clear all Setup check messages and re-run the setup check; this will clear any ‘sticky’ messages.
This list is not exhaustive.
Some Display Module types support a programmable track database. The track database allows the display to automatically select a nearby GPS start/finish line based upon the GPS position.

Track Database
A track database can be maintained on the PC. It is a folder containing kml or kmz files called “Tracks” under the Dash Design documents folder.
Click the Explore button on the Track Database dialog to open the folder in Windows® file explorer.
Select the tracks that you want to program by checking them in the list then click the  Program Display button.
Avoid programming the display with multiple versions of the same track since the Display may not choose the correct version of the track.
Use the  Read Display button to read the tracks that are currently loaded in the display and update the checked tracks in the track database dialog.
Any tracks that exist in the display that do not exist on disk shall be added to the list (but not added to the Tracks folder).
Tracks can be defined either by editing KML files (an XML type format) by hand, or by using an editor such as Google Earth. A zipped KML format is also supported (KMZ).
The KML file should contain a folder with the name of the track. Within this should be a line string with the name “Start/Finish” and may also contain numbered split lines (e.g. Split1 or Split2). At present, only the Start/Finish line is programmed into the display.
The “Start/Finish” and any “Split” lines must have 2 points only. These lines should cross the track perpendicular to the line that the car would take. The direction of the line is 90° clockwise from the first point. So, given a track that is oval and the car is running clockwise around the track, the line would start inside the oval and end outside. If the car was running anti-clockwise then the line would start outside the oval and end inside it.
The track definition may also contain a line string for the track itself called “Track”. This is rendered in the Track Database dialog as a thumbnail and is currently purely for visualization purposes.
For example:
<?xml version="1.0" encoding="UTF-8"?>
<kml xmlns="http://www.opengis.net/kml/2.2" xmlns:gx="http://www.google.com/kml/ext/2.2" xmlns:kml="http://www.opengis.net/kml/2.2" xmlns:atom="http://www.w3.org/2005/Atom">
<Document>
    <name>Silverstone.kmz</name>
    <Folder>
        <name>Silverstone</name>
        <Placemark>
            <name>Start/Finish</name>
            <LineString>
                <tessellate>1</tessellate>
                <coordinates>
                    -1.023222302590363,52.06815679907218,0 -1.023762259441994,52.06840339462266,0
                </coordinates>
            </LineString>
        </Placemark>
        <Placemark>
            <name>Track</name>
            <LineString>
                <tessellate>1</tessellate>
                <coordinates>
                    -1.023457440705252,52.06826330469951,0 -1.022211981150893,52.06926392138978,0 -1.020120716246536,52.07094945894832,0 -1.019798435446819,52.07119895390668,0 -1.019601119519132,52.07126226540072,0 -1.01937873321533,52.07130387583826,0 -1.019151596800913,52.07132015409328,0 -1.018864704792763,52.07132699524943,0 -1.018571326775504,52.07130765223916,0 -1.018287746835613,52.07128456546694,0 -1.017245837241402,52.07119202674222,0 -1.016972301678272,52.07118239377338,0 -1.016710355235815,52.07119694839953,0 -1.016431744521955,52.07122766516974,0 -1.016139377047914,52.07129194838007,0 -1.015890779969542,52.07137482110704,0 -1.015660378114936,52.07146988771898,0 -1.015329365246891,52.07163540796481,0 -1.014912384781105,52.07184482607399,0 -1.014278792857228,52.07215527769836,0 -1.013875376200518,52.07235236448024,0 -1.013618131981842,52.07247620811879,0 -1.013447409552678,52.07251877034994,0 -1.013319975021001,52.07252522993891,0 -1.013184409430378,52.07250628693589,0 -1.01310077472047,52.07246933328934,0 -1.013033850291631,52.07241324861703,0 -1.012978908879991,52.07235209663881,0 -1.012860470987238,52.07212659337567,0 -1.012577418468494,52.07155200071375,0 -1.012521435811164,52.0714882955801,0 -1.01241641133345,52.07143118406936,0 -1.012296608528234,52.07139858475865,0 -1.012165632134893,52.0713992211664,0 -1.012040161907365,52.07143360936539,0 -1.011947625906483,52.07150255189591,0 -1.011843568280048,52.07161602819282,0 -1.011690025087647,52.07186487421092,0 -1.011546321340735,52.0721562329888,0 -1.011430985337407,52.07252893286008,0 -1.011401929202499,52.07290108966808,0 -1.011419609454781,52.07302600696883,0 -1.011458558599511,52.07307834034388,0 -1.011508853351684,52.07311677085882,0 -1.011745977479267,52.07324596402563,0 -1.012380629940351,52.0736254031531,0 -1.013196080280964,52.07408080117892,0 -1.01447343285189,52.07480129681431,0 -1.015659863767252,52.07545649600331,0 -1.018450323972536,52.07699568325367,0 -1.018628666371085,52.07707198799071,0 -1.018852364896329,52.0771302583529,0 -1.019139998237194,52.07715507260878,0 -1.019425637860738,52.07713550285217,0 -1.019717685896793,52.07707442375945,0 -1.019717838927831,52.07707159871079,0 -1.019875432474793,52.07700612118002,0 -1.019974638263597,52.0768873138033,0 -1.020021797462273,52.0767578285128,0 -1.020048264359766,52.07651102214933,0 -1.020115356756105,52.07616091012261,0 -1.020218197163085,52.07602511655598,0 -1.02037330652471,52.07591751384516,0 -1.020577851231113,52.07584315361245,0 -1.020827875515469,52.07580418109799,0 -1.021072945038164,52.07581683210579,0 -1.021301749328888,52.07587772966747,0 -1.021505454046772,52.07598109362632,0 -1.02161258467528,52.07610917315833,0 -1.021652404108211,52.07627270721889,0 -1.021590593993534,52.07647689871101,0 -1.021286511375399,52.07685291248266,0 -1.020652373384661,52.0776370848383,0 -1.02041866101886,52.07781871987165,0 -1.020092038113648,52.07803677596841,0 -1.019717807773661,52.07824558471947,0 -1.019305157925989,52.07842379851116,0 -1.018942220901495,52.07852426096748,0 -1.018474214581038,52.07859650614207,0 -1.018218625788347,52.07861972841747,0 -1.016822932764364,52.07871116772316,0 -1.015215962508181,52.07880785609512,0 -1.012305414454012,52.07894242003761,0 -1.012069324934228,52.07892135838949,0 -1.011812287263301,52.07886274393292,0 -1.011544712985256,52.07876463011411,0 -1.011325781872238,52.07862751294066,0 -1.011189887559795,52.07849677966099,0 -1.011072443810749,52.07833352502246,0 -1.010878355938465,52.0779797545011,0 -1.010579382179875,52.07732122547742,0 -1.010420235949071,52.07681709510778,0 -1.01035845420526,52.07654002030849,0 -1.010306317114715,52.07626143166188,0 -1.010247579099783,52.07547762183768,0 -1.010200584898043,52.07487666001721,0 -1.010162668030518,52.07448340195425,0 -1.010126731347698,52.07432607886552,0 -1.010033011909288,52.07414893753801,0 -1.009922028249696,52.07398318913559,0 -1.009795759633373,52.07383671627831,0 -1.009619975065831,52.07367883801017,0 -1.009530466507066,52.07356252451558,0 -1.009493134815458,52.07345076484788,0 -1.009497819412188,52.07331725306135,0 -1.009600570681212,52.07308949360063,0 -1.009956518897663,52.07250080776188,0 -1.010017906032059,52.07234566981564,0 -1.01005532854137,52.07215915683623,0 -1.010046873519478,52.07202014893785,0 -1.009999523437812,52.07188024257708,0 -1.009907535127204,52.07176183639039,0 -1.009761495978749,52.07162751386204,0 -1.009358756794367,52.07128628849334,0 -1.00927500235878,52.07114744259604,0 -1.009246400994753,52.0709824561481,0 -1.009275912175003,52.07082781736657,0 -1.009352308809192,52.07069700058285,0 -1.009499838955851,52.07057072481957,0 -1.009668846635452,52.07047544926077,0 -1.009968824890688,52.07034941323089,0 -1.010703847512975,52.07007364808247,0 -1.010954790396897,52.06995193270534,0 -1.011134893382093,52.06982333480508,0 -1.0112802301664,52.06968308883275,0 -1.011487348312824,52.06945911629902,0 -1.011875581776741,52.06903082544272,0 -1.012435485276765,52.06839581531909,0 -1.013189644512745,52.06750948640506,0 -1.013190034239836,52.06750682049438,0 -1.013924670314729,52.06665196188685,0 -1.01518018343172,52.0652240028476,0 -1.015697144843778,52.06470434768345,0 -1.016297065716387,52.06416946728359,0 -1.016714998499388,52.0638115998371,0 -1.016916639133029,52.06369105032819,0 -1.01714504851143,52.06360779571828,0 -1.017463999886501,52.06354588523977,0 -1.017741099362506,52.06352117067455,0 -1.018047136012797,52.06354825699662,0 -1.018357949625235,52.06362366830372,0 -1.018585977361718,52.06372282489181,0 -1.018757838580764,52.06383139030437,0 -1.018919530710179,52.06401319695608,0 -1.019193793181883,52.06437476749688,0 -1.019342576765286,52.06454665058445,0 -1.019560414927535,52.0647570737635,0 -1.019851113106613,52.06500979059036,0 -1.020118485426937,52.06522933960495,0 -1.020319327321483,52.06536183072669,0 -1.021904687305164,52.06646707823193,0 -1.022006167024642,52.06652923634018,0 -1.022116718992182,52.06655390448029,0 -1.022226148969702,52.0665544164719,0 -1.022344063359594,52.06651762944266,0 -1.022467285354731,52.0664455046743,0 -1.022688100572002,52.06631291707106,0 -1.02282674096245,52.06625648403141,0 -1.022978555415159,52.06622992489552,0 -1.023122296152442,52.06623924680579,0 -1.023275486178706,52.06628604660686,0 -1.023422360881027,52.06636991413968,0 -1.023712831963494,52.06657146267329,0 -1.023954639926107,52.0667937231116,0 -1.024130329955542,52.06704852450726,0 -1.024270181387696,52.06738531174683,0 -1.024289040661949,52.06750594128725,0 -1.024261330339462,52.06759304219368,0 -1.024189871725516,52.067666168009,0 -1.024025725032678,52.06779026751038,0 -1.023457440705252,52.06826330469951,0
                </coordinates>
            </LineString>
        </Placemark>
    </Folder>
</Document>
</kml>Dash Design provides undo/redo functionality for reverting / re-applying changes to the setup.
If an unintentional/unwanted change is made then Ctrl + Z will revert the change.
To re-apply the un-done changes, use Ctrl + Y.
If the setup is edited following an undo operation then this will clear any of the items available for ‘redo’.
A history of changes made to the setup during the current session is available using Ctrl + H
Selecting items in the history list will revert the setup to that point in time.
provides a way to view a list of all fonts used by gauges in the setup.

Unique Fonts Dialog
The Unique Fonts dialog presents a list of fonts that are used by gauges in the current setup. There may be more than one gauge using the same font.
Selecting a font in the list will enable the edit / copy / paste / find functions.
The font list indicates the size and style of the font.
Additionally the list will identify fonts that are ‘vector’ fonts - see Font Types .
Fonts may be  copied and
 pasted into another ‘font’. Pasting a font will replace all instances of the font being ‘pasted into’, resulting in the list of gauges for each font being combined to use the same font.
A font copied from the Unique Fonts dialog may also be pasted onto a gauge’s Font property using the properties context menu on the Design Tab .
The  Find button will search through screens for gauges that use the selected font and select the first usage in the Design Tab
.
A list of all gauges / screens that use the selected font may be displayed by selecting “List associated gauges” from the context menu (right-click). Double clicking on an item in the subsequent list will select the gauge in the Design Tab .
The gauges associated with the selected font may be deleted by selecting “Delete associated gauges” from the context menu (right-click). This action may be un-done using Ctrl + Z.
Select a font and click the Edit button.
The Font Editor will be displayed. If accepted then all gauges using the selected font shall be updated.
The physical units of some Channels can be changed globally via

Unit Preferences Dialog
Select an item in the Unit column and click on the … button. This will pop up a dialog for selecting the units for that quantity:

Unit Preference Selection
Select an item from the list and click OK.
If the ‘Auto Apply to Channels’ checkbox is checked in the Unit Preferences dialog then any channels that produce physical values in that quantity shall be updated to display values in the selected unit.
Dash Design will insert hidden channels to re-scale values for presentation in gauges.
Clicking the Presets button will allow selection from some preset unit preferences for SI units or US units:

Unit Preferences Presets
The View menu provides options for arranging the Dash Design workspace:
| Command | Description |
|---|---|
| F11 | Displays the Dash Design window full screen. |
| Resets the layout of the windows docked to the edges of the main window. | |
| Displays CAN IDs in hexadecimal format. | |
| Displays the Setup Checker . |