Events Tab
Overview
The Events Tab provides a single place to view and configure internal events.
Many events are configurable elsewhere at point of use, such as timer start/stop/reset events.
Events can be used to trigger an effect such as a screen change or trip reset.
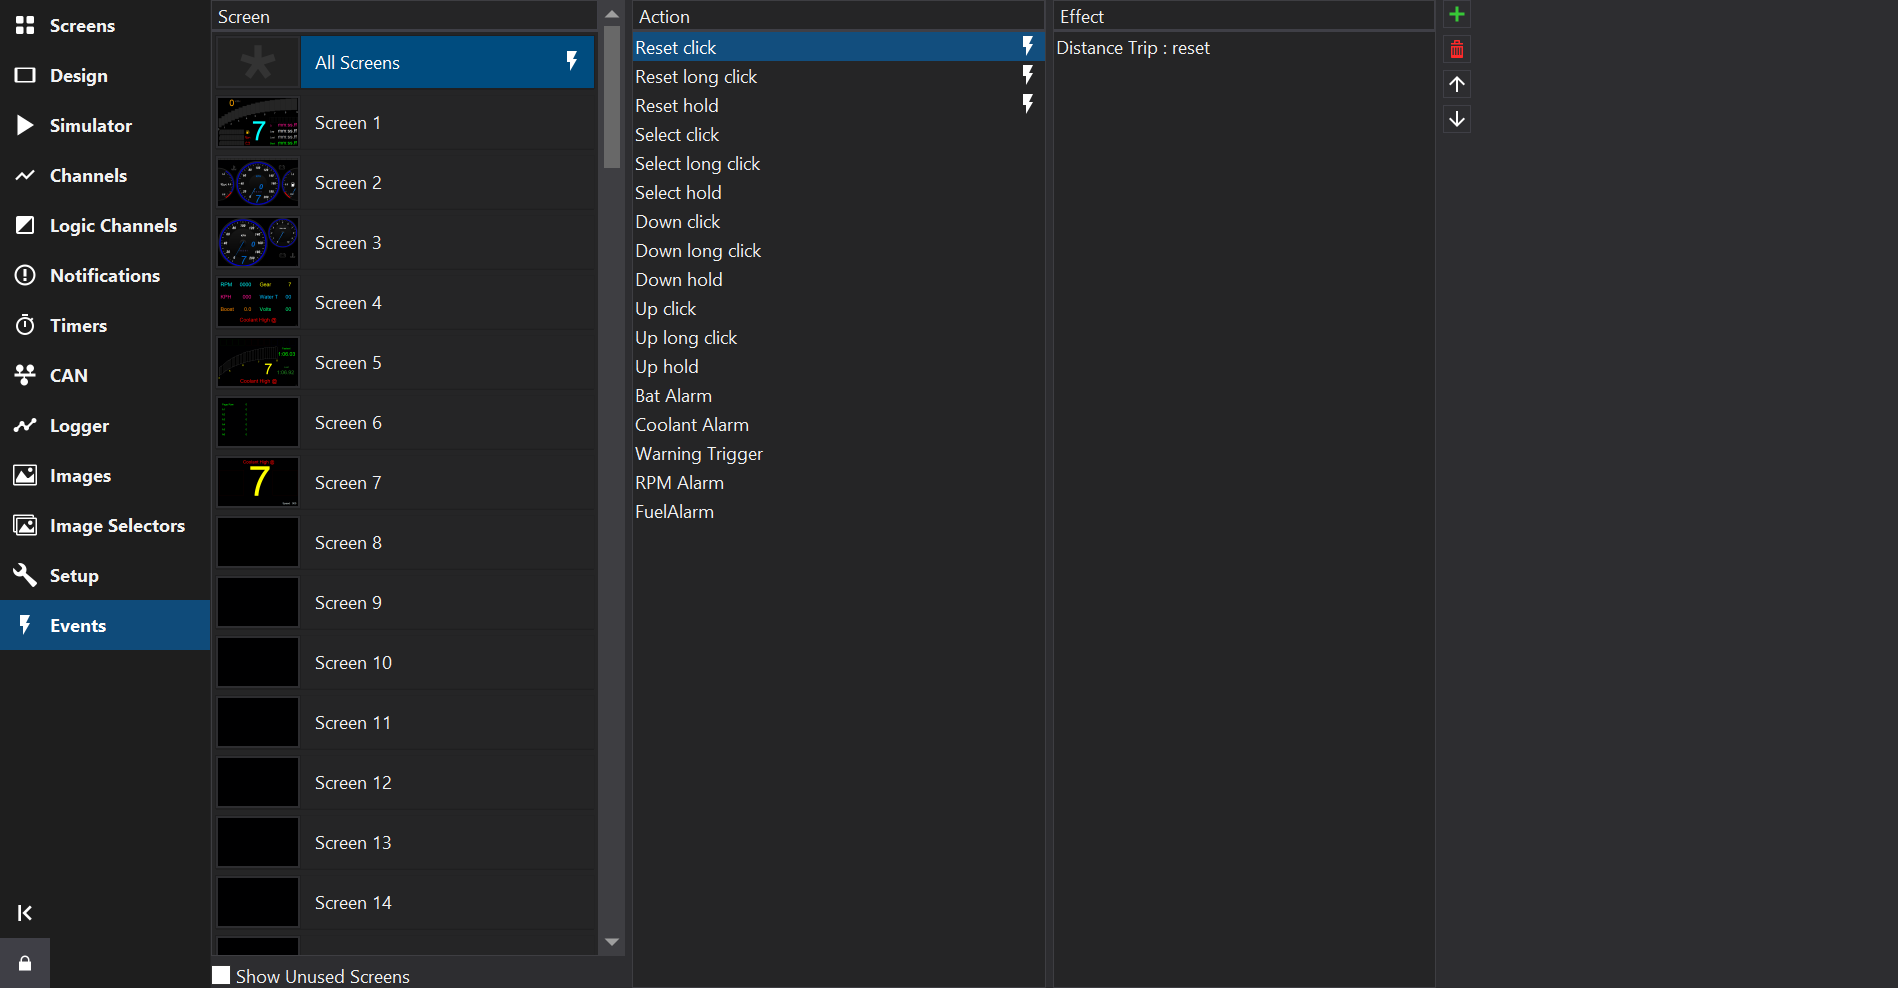
The Events Tab is divided into 3 columns:
Screen
Each screen may have a different set of events defined.
At the top of the list is the All Screens item for events that should be active on all screens.
If a screen has any events defined then it will display a lightning bolt  icon.
At the bottom of the Screen List, the Show Unused Screens checkbox may be used to show / filter out any screens that are not configured with any Gauges.
Action
The Action column lists the actions available on the selected screen.
Action Types
The following types of event actions are available:
-
Buttons - The button inputs on the display can generate the following actions:
- Click - Triggered when the button is released, if it was pressed for less than 1 second.
- Long Click - Triggered when the button has been held for 1.5 seconds.
- Hold - Triggered repeatedly while the button is held for more than 1 second. Hold events start at 4 per second and speed up the longer the button is held. This is useful for rapidly increasing or decreasing numbers.
A button held for 1.5 seconds therefore generates both Hold and Long Click actions, but no Click action.
-
Logic / Alarms - Any logic channels created in the main setup are available to trigger an event. The event is triggered when the channel changes from 0 to a non-zero value, or at start-up if the channel is already non-zero.
-
On Change - Any on change outputs created in the main setup are available to trigger an event. Two actions are created for each on change output:
- The On Change action occurs when values monitored by the on change output start changing.
- The On Change Revert action occurs when values monitored by the on change output stop changing.
Effect
The Effect column lists any effects that should happen in response to an event.
On the right of the Effect list, use the  button to add a new effect, and the
 button to remove the selected effect(s).
Use the up / down buttons to change the order of the selected effect in the list.
Adding an Effect
If the button is clicked, a list of available effects may be selected from to add to the list of effects for the selected action on the selected screen.